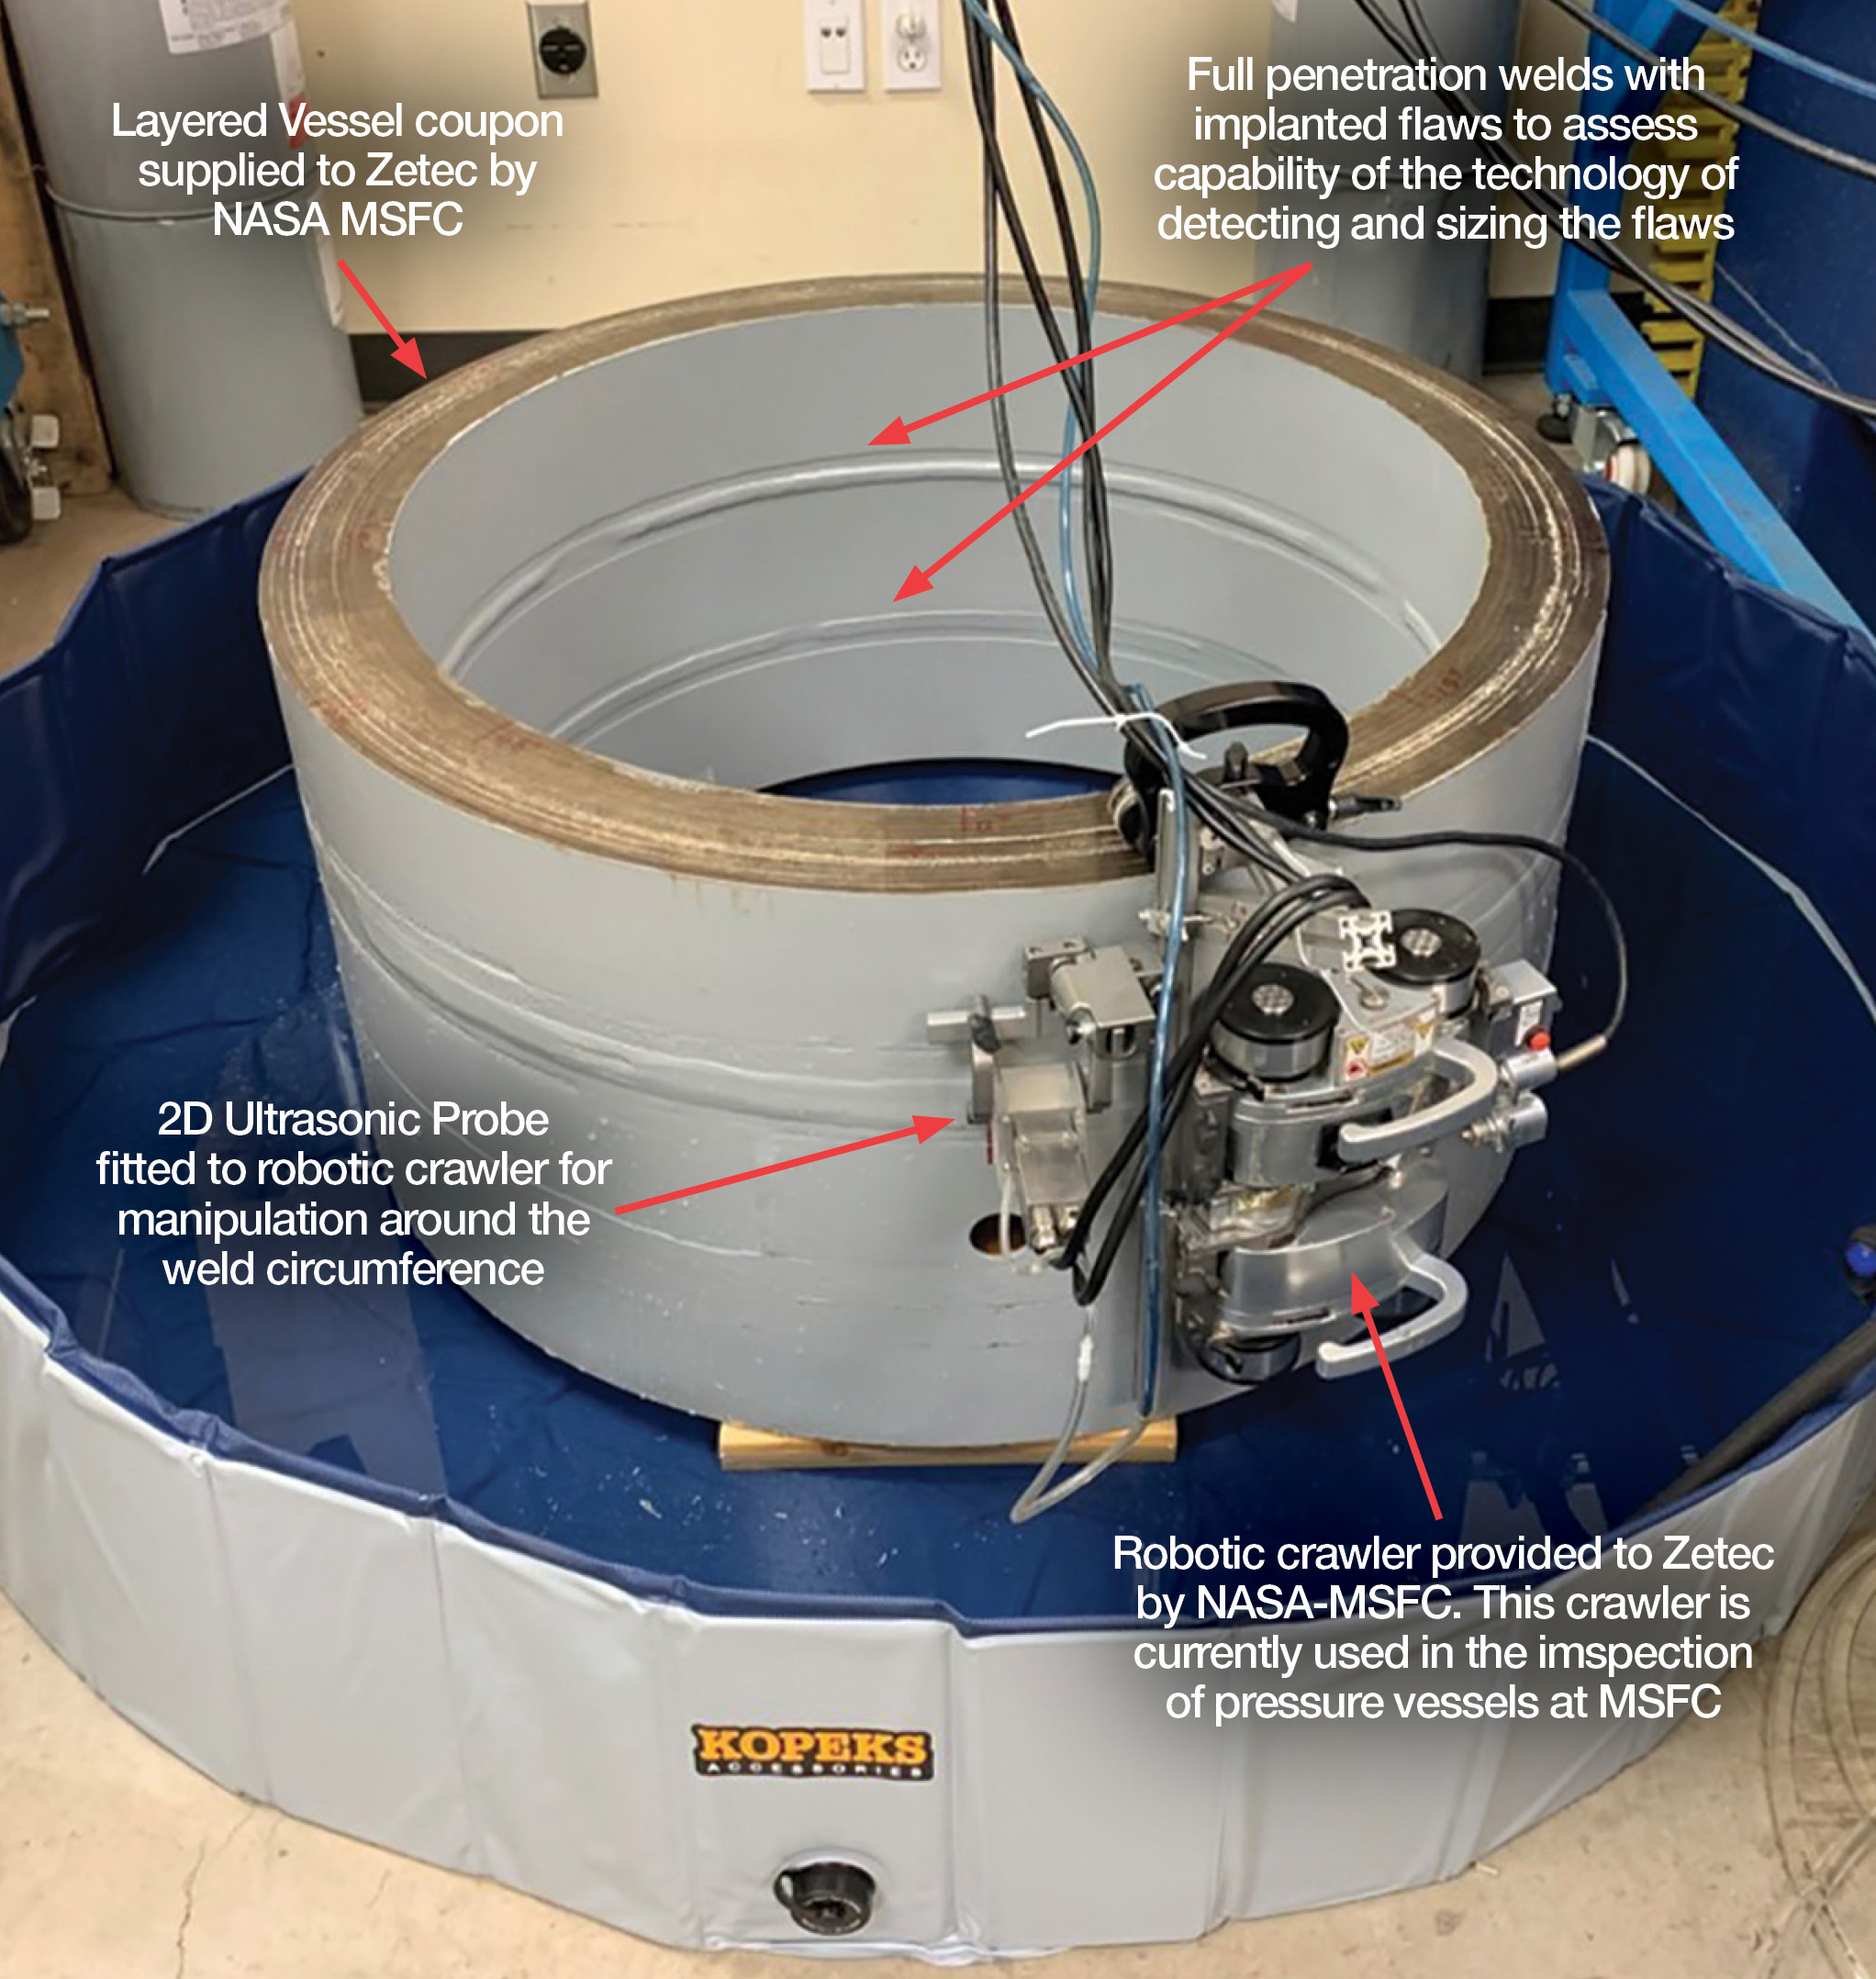
The Office of Safety and Mission Assurance’s Multi-Layered Pressure Vessel Risk Mitigation Project (MLPVRMP) made significant advancements in detecting weld flaws in Multi-Layered Pressure Vessels (MLVP) through the use of advanced techniques in Nondestructive Evaluation (NDE). The unique design and fabrication of MLPVs made inspection of inner weld areas joining shell to shell layers impossible, until now. This breakthrough presents the agency with the ability to thoroughly examine and baseline in-service MLPVs for critical weld flaws, thereby supporting selective MLPV replacement based on verified risk.
NASA released a government Request for Information entitled “Feasible Technologies for Non-Destructive Evaluation of Layered Pressure Vessels” (reference RFI NNM17ZQD001L) in 2017 to identify promising technologies that could be employed for examination of MLPV circumferential welds. The agency Layered Pressure Vessel (LPV) Working Group evaluated the responses and down selected an NDE company, Zetec, which specializes in advanced ultrasonic NDE techniques. The LPV Working Group selected Phased Array Ultrasonic Test (PAUT) techniques using 2D probes for further evaluation.
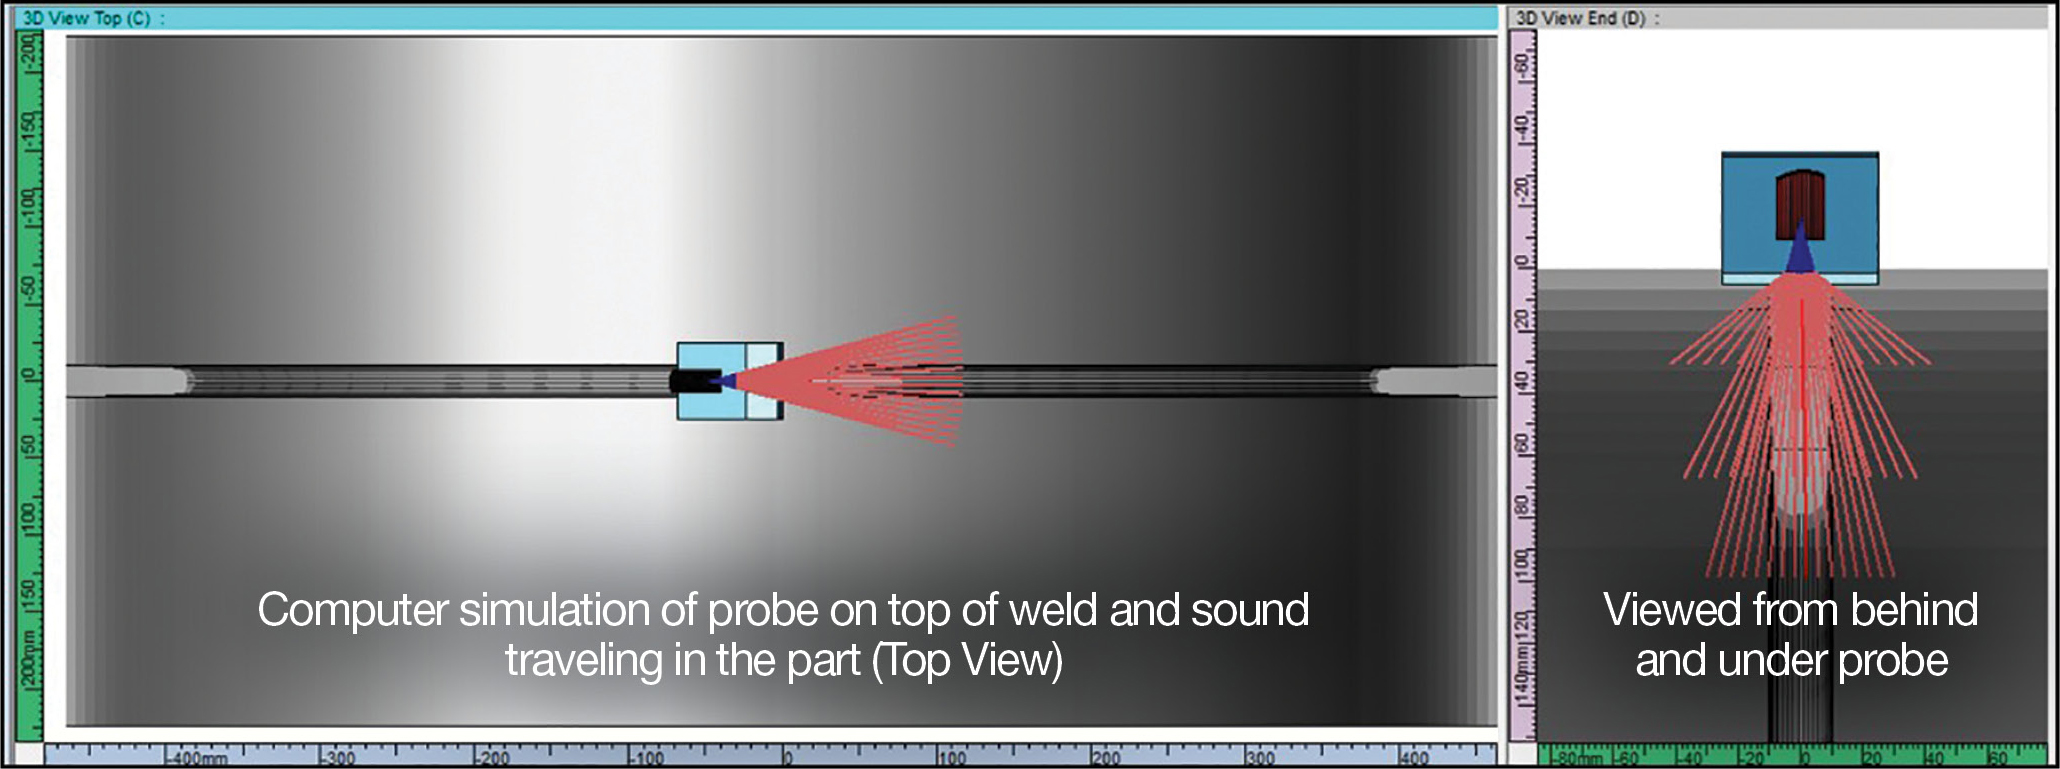
Last week, Zetec — from its Quebec City, Canada, facility — provided a virtual demonstration of a state-of-the-art, commercially available PAUT system, marketed as the Dynaray System which was coupled with 2D sensing units (probes). Zetec performed volumetric weld scans of a NASA provided MLPV coupon which contained both surface connected and embedded weld defects.
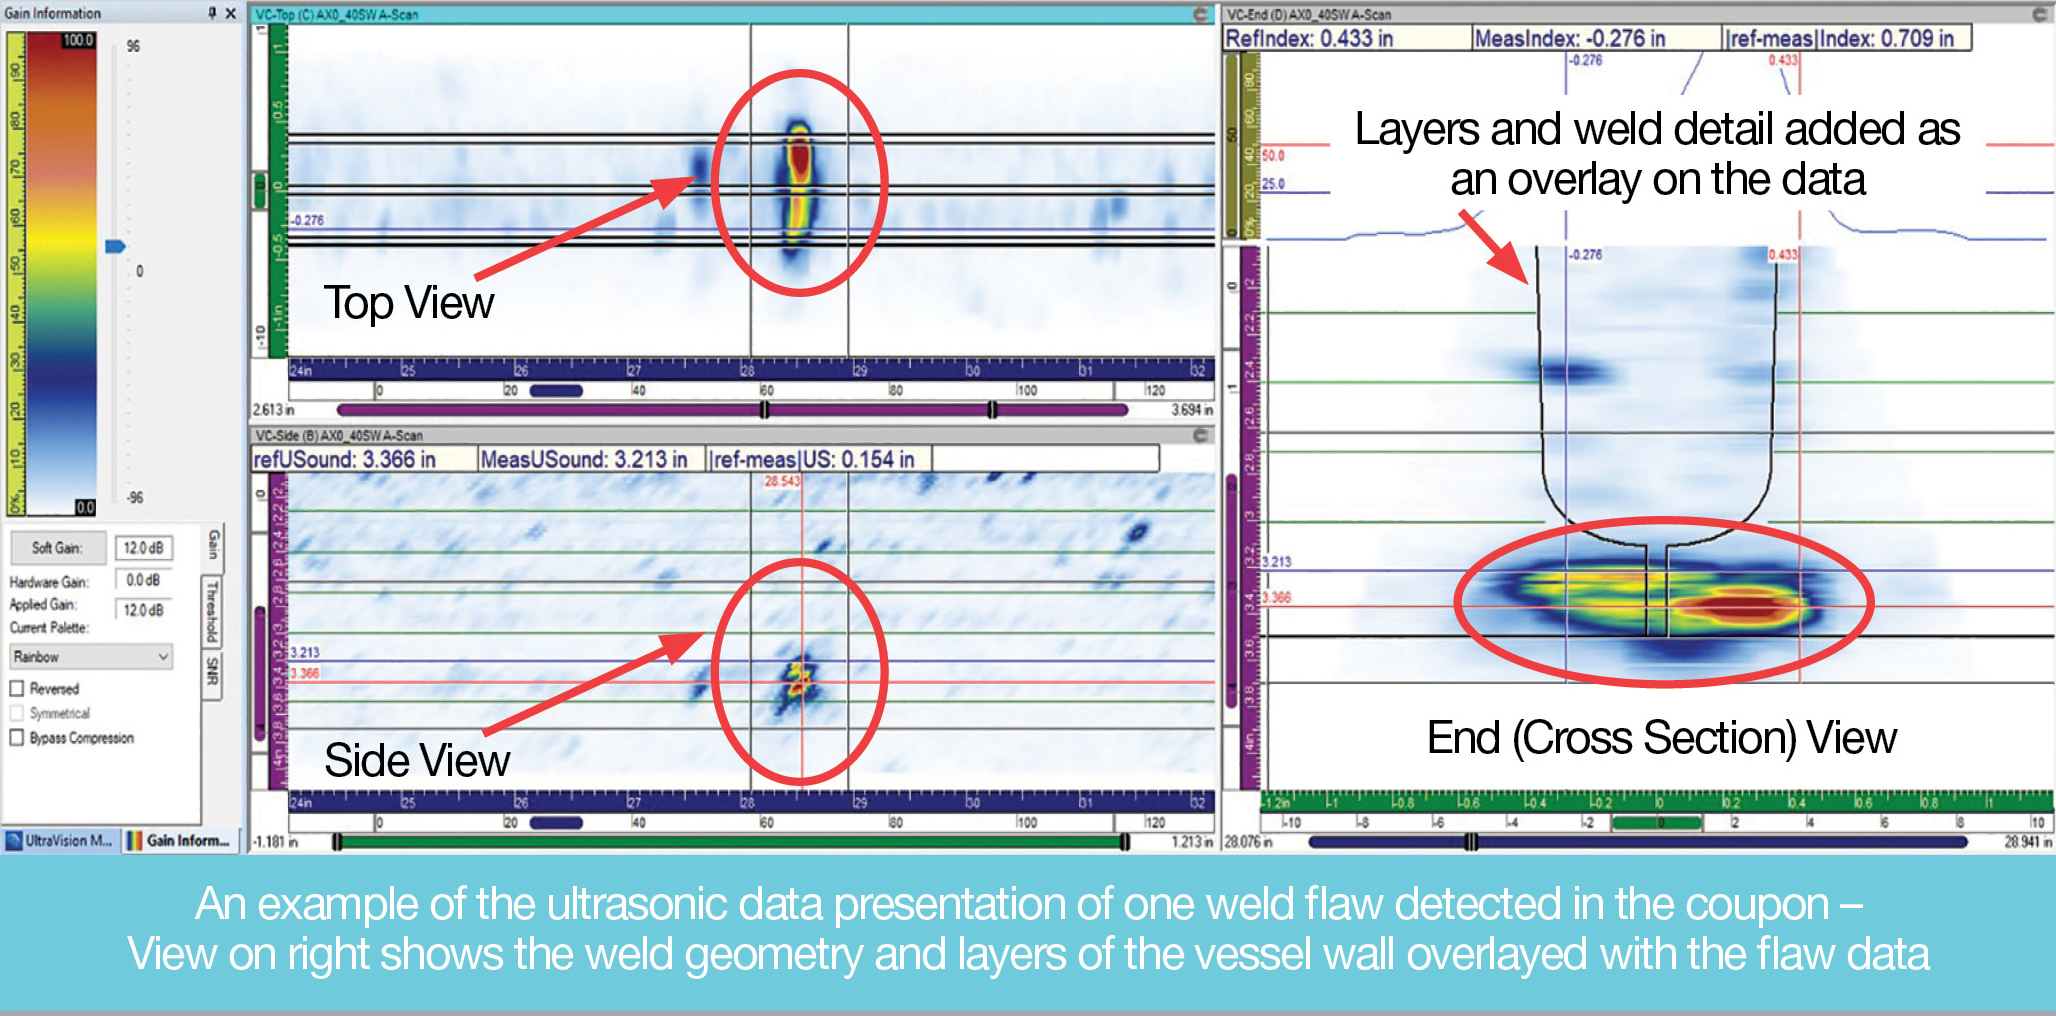
“Phase 1 — the initial demonstration of the technology — is very promising,” said Clifton Arnold, Pressure Systems, Lifting Devices and Equipment, and Propellants and Pressurants program executive. “Zetec was able to clearly identify specific weld flaws, which previously were undetectable by more conventional and less powerful PAUT equipment currently being employed within the agency.
Phase 2 — Zetec testing — involved scans of a second weld, also with embedded flaws. The inspection technique offers the ability to steer ultrasonic waves into previously “blind” areas of shell-to-shell circumferential welds. This steering capability is an inherent advantage to 2D probes, but Zetec and NASA optimized it through the use of specific angles and custom-angled wedges to interrogate the weld volume from the flattopped weld surface. This is a new approach to the inspection of this type of weld and offers the ability to evaluate the weld integrity without removing the vessel from service, which minimizes operational impacts during inspection.
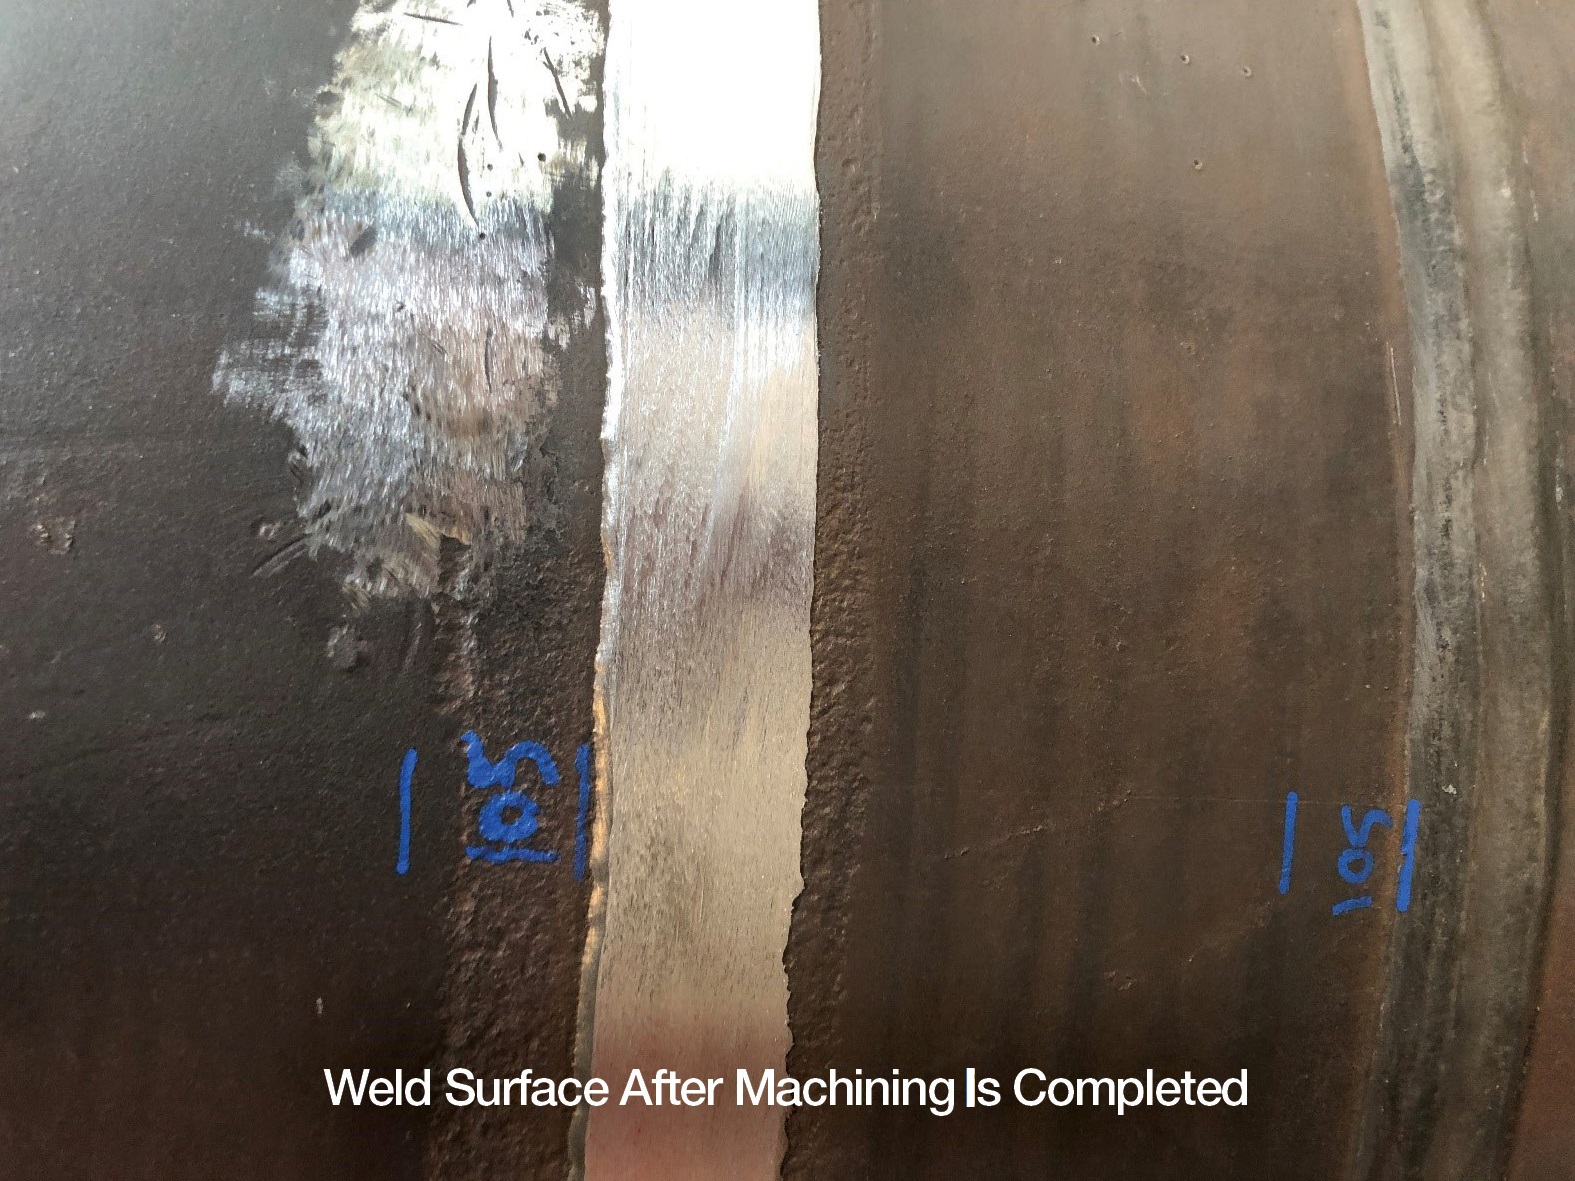
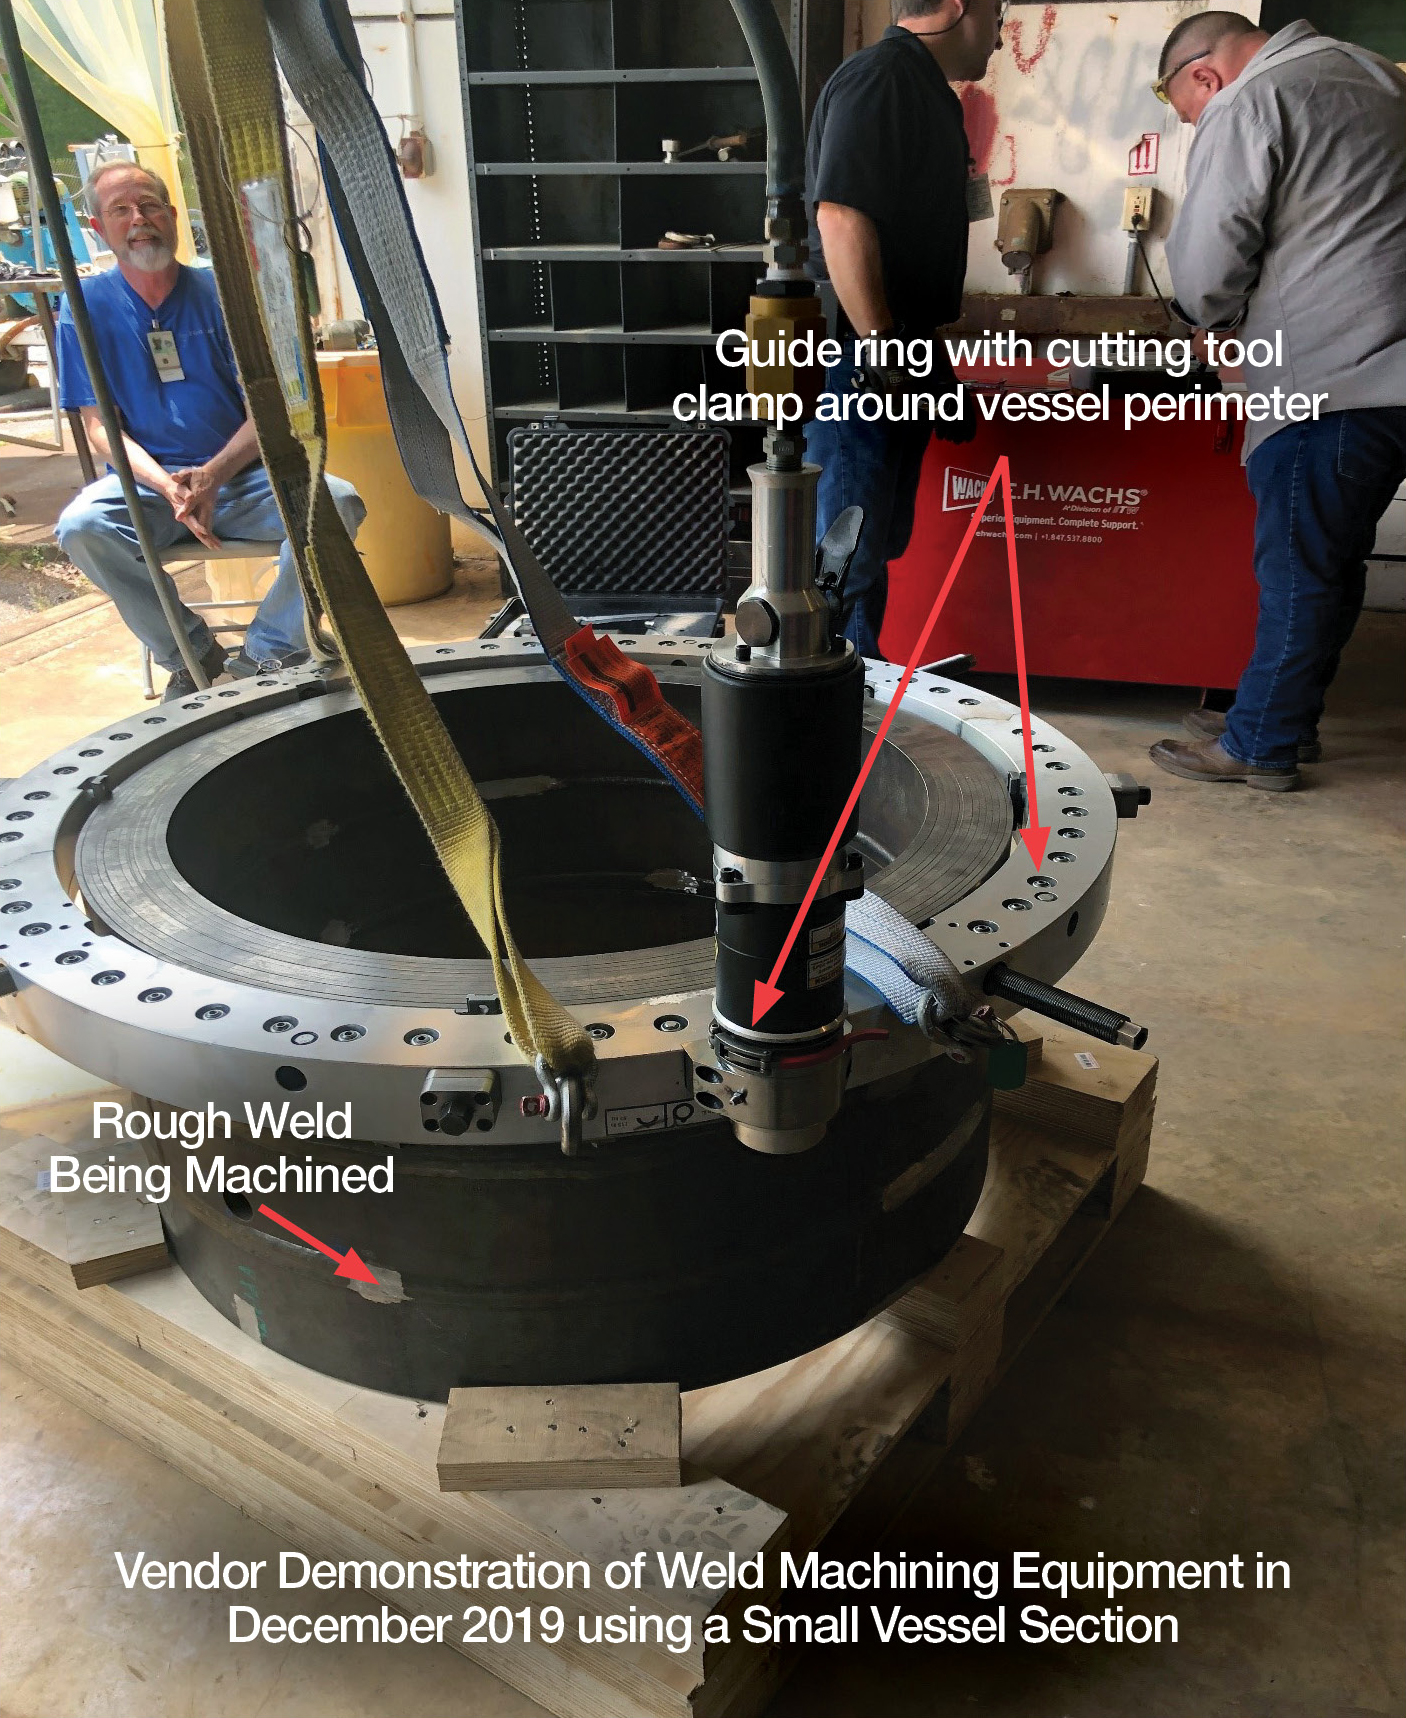
In order to deploy the PAUT system for inspection of MLPVs, rough shell-to-shell weld surfaces need to be machined flat and relatively smooth. The machining operation is necessary to obtain sufficient coupling (intimate and consistent contact) between the PAUT sensing unit and the shell-to-shell weld surface and ensure the highest probability of detecting critical defects within the weld volume. The MLPVRMP is currently working with private vendors to obtain cost estimates and understand the logistics involved for the weld machining operations.
For more information, contact Arnold.